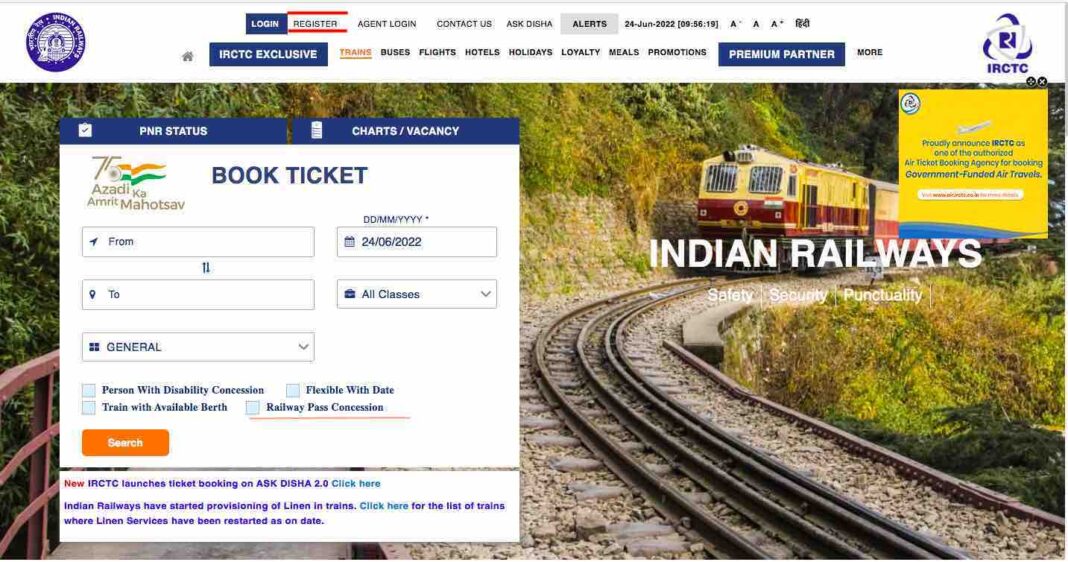
Creating a new IRCTC account and booking train tickets online is a simple process. Follow these step-by-step instructions to create an account and book train tickets through the Indian Railway Catering and Tourism Corporation (IRCTC) website or mobile app:
1.Visit the IRCTC website or download the IRCTC Rail Connect app:
- Website: Go to the official IRCTC website (https://www.irctc.co.in/).
- Mobile App: Download the ‘IRCTC Rail Connect’ app from the Google Play Store or the Apple App Store.
2.Register for a new account:
- On the website, click on the “Register” button on the top right corner.
- On the mobile app, tap on the “Register” option on the login screen.
- Fill out the registration form with your personal details, including your name, date of birth, email address, mobile number, and residential address.
- Choose a unique username and a strong password.
- Read and accept the terms and conditions, then click “Submit” or “Register.”
3.Account activation and verification:
- After submitting the registration form, check your email for an activation link. Click on the link to activate your account.
- You will also receive an OTP (One-Time Password) on your registered mobile number. Enter the OTP on the IRCTC website or app to verify your mobile number and complete the registration process.
- number and complete the registration process.
4.Log in to your IRCTC account:
- On the website, enter your username and password in the “Login” section on the top right corner, and click “Sign In.”
- On the mobile app, enter your username and password on the login screen, and tap “Sign In.”
5.Book train tickets:
- After logging in, you’ll be taken to the dashboard. On the website, click on the “Plan my journey” tab, while on the app, tap on the “Train Ticket” option.
- Enter your travel details, including the source and destination stations, journey date, and ticket class. Click or tap “Find Trains” to see a list of available trains.
- Browse through the list of trains and select the one that best suits your travel needs. Check the availability of seats and click or tap on “Book Now” or the class of your choice (e.g., 2A, 3A, SL, etc.).
- Fill out the passenger details, including name, age, gender, and seat preferences. Add additional passengers if needed.
- Review your booking details and click or tap “Continue Booking” or “Continue to Payment.”
6.Make payment:
- Choose your preferred payment method (e.g., credit/debit card, net banking, UPI, wallets, etc.) and complete the
- payment process. Ensure that you provide the correct payment details and complete the transaction securely.
- Once your payment is successful, you’ll receive a confirmation message along with your PNR (Passenger Name Record) number and ticket details. You’ll also receive an SMS and email with the ticket information.
7.Access your booked tickets:
- On the website, go to “My Account” and click on “My Transactions” to view your booked tickets.
- On the mobile app, tap on the “My Bookings” option to see your booked tickets.
You can now use your PNR number to check the status of your reservation, print or download your e-ticket, or make changes to your booking if needed. Remember that some changes may require you to pay additional fees, depending on the Indian Railways’ rules and regulations.
When traveling, carry a valid ID proof along with your e-ticket, as it is mandatory for verification during the journey.

